Steps to follow
Step 1. Camera Configuration
1. Remove optical stabilization.
2. Disable automatic rotation of photos.
3. If you are not familiar with the camera, use the mode Automatic.
4. Fix the focal point.
5. Fix the dimensions of the image.
If you change the camera focal distance (zoom +/-) and / or image dimensions, calibration will be different.
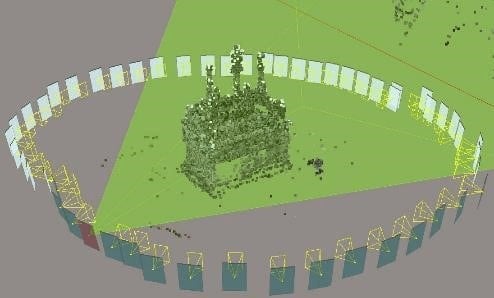
Step 2. Photo acquisition
1. Select scene highly textured and geometrically complex.
2. Get 360-degree photos around the scene.
3. Take photos holding the camera in different positions (horizontal / vertical). NB this applies only if the automatic rotation mode is disabled.
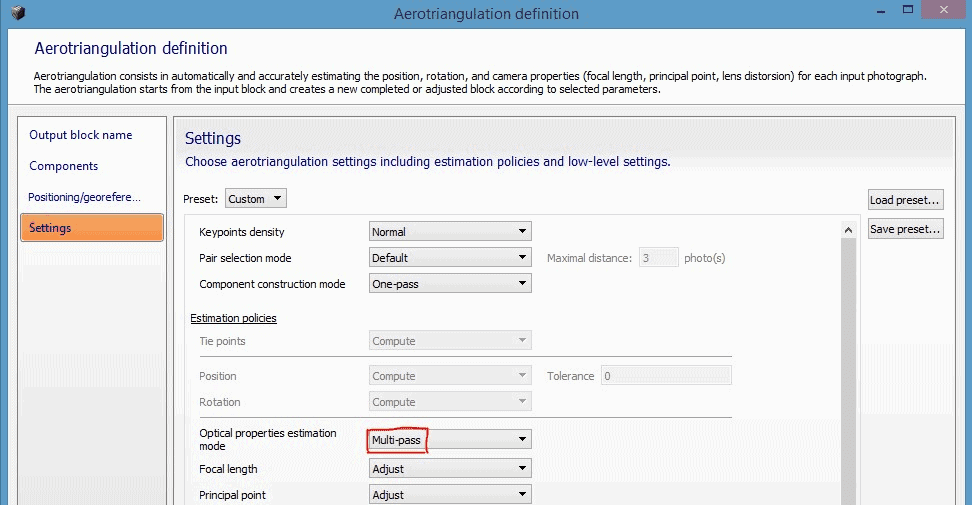
Step 3. Process your dataset in ContextCapture
1. Create a new project and import your photos.
2. In the Photogroup tab, select the camera type used: perspective / fish-eye.
3. Submit and aerotriangulation. In the aerotriangulation definition parameters, set the parameter «mode of estimating optical properties» on «multipass».
Step 4. Save your camera calibration in the user database
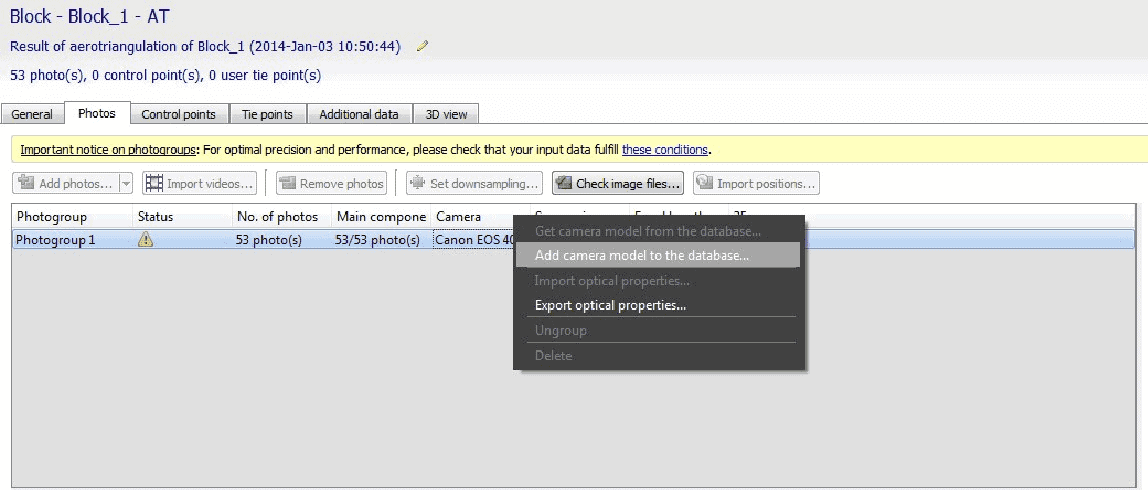
1. Go to the Photo tab and right click on the photogroup. Click Add camera model to the database
2. When processing another project using the same camera, the last calibration will be used by default. Otherwise, you can still access it from the camera database by selecting Get camera model from the database
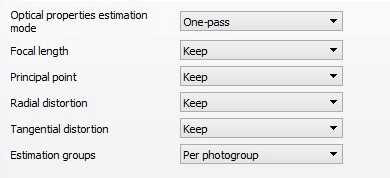
Step 5. Prevent software from adjusting settings
1. In some cases, you can prevent the software from adjusting camera settings, for example, if a calibration already exists or has already been imported from the database.
2. In the definition parameters of the aerotriangulation, define the focal distance, the main point and the radial distortion on « Keep ».